
The secret to a spacious small condo isn’t just decluttering; it’s strategically reducing ‘visual noise’ to lower your brain’s cognitive load.
- Swap chaotic open shelves for sleek, closed storage to instantly create a sense of calm and order.
- Make intentional lifestyle trade-offs, like a downtown location over a suburban house, to gain a “lifestyle dividend” of time and money.
Recommendation: Start with the ’90-Day Outbox’ method to test removing items without feeling deprived, then reinvest in high-quality, multi-functional pieces.
Living in a 500-square-foot condo can feel like a constant battle against closing walls. You’ve likely heard the standard advice: “buy mirrors,” “paint everything white,” and “declutter relentlessly.” While these tips have some merit, they often feel like temporary fixes that don’t address the root cause of that claustrophobic feeling—the overwhelming sense of visual chaos.
These common solutions treat the symptom, not the disease. The real problem isn’t just the lack of space; it’s the high cognitive load your brain endures processing every single item left in view. But what if the key to unlocking more space wasn’t about adding another mirror, but about subtracting visual information? What if you could strategically redesign your small home to not only look bigger but to feel calmer and give you back your most valuable asset: time?
This guide moves beyond generic hacks. We’ll explore a strategy based on visual psychology and intentional trade-offs. We will start by examining the macro-decisions, like location and transportation, that create a “lifestyle dividend.” Then, we will dive into the micro-decisions within your four walls—from re-evaluating multi-functional furniture and managing possessions without deprivation, to mastering vertical space and understanding the critical mistake of open shelving. Finally, we’ll tackle specific challenges like bringing life to a windowless den. This is your blueprint for turning a small footprint into a spacious, strategic home.
To help you navigate these transformative strategies, here is a complete overview of the topics we will cover. Each section builds on the last, providing a comprehensive roadmap to reclaiming your space and your peace of mind.
Summary: A Strategic Guide to Expanding Your Small Condo with Psychology
- Why choose a high-density condo in downtown Toronto over the suburbs to save 2 hours of daily commute?
- Zipcar and Communauto: do you really need a second car in a walkable zone?
- How converting a dining room into a bedroom increases yield by 15% in student towns?
- Murphy beds and extending tables: are they practical for daily use or just gimmicks?
- How to adopt a “one in, one out” policy without feeling deprived?
- Floor-to-ceiling shelving: utilizing the top 2 feet of your walls effectively
- The visual noise mistake: why open shelving makes small spaces look smaller
- How to light a windowless den to make it feel like a real room?
Why choose a high-density condo in downtown Toronto over the suburbs to save 2 hours of daily commute?
The first step in making a small space feel expansive is a counter-intuitive one: it starts before you even think about furniture. It’s about choosing to trade square footage for something far more valuable—time. For many, the Canadian dream involves a sprawling suburban house, but this often comes with a hidden cost: a soul-crushing commute. In fact, data reveals that Toronto has the longest average commute times in Canada, with GO Train riders from the suburbs often facing journeys of 70 to 88 minutes each way. In contrast, a downtown resident’s “commute” is often a 15-minute walk or a short TTC ride.
This isn’t just a minor inconvenience; it’s a fundamental lifestyle choice. Saving two hours per day equates to ten hours a week, or over 40 hours a month. As a Toronto Life analysis puts it, this is the equivalent of reclaiming a full work week every month for hobbies, health, or family. This reclaimed time is the “lifestyle dividend”—the single greatest luxury a downtown location provides. It transforms your perception of home from a place you escape *to* after a long journey into a central hub from which your life effortlessly unfolds.
When you factor in the true costs, the financial argument also becomes compelling. The trade-off between a downtown condo and a suburban home isn’t as simple as purchase price. It’s a holistic calculation of time, money, and quality of life.
The following comparison breaks down the real-world implications of choosing a compact downtown condo over a larger suburban home in the Greater Toronto Area. This data highlights how a smaller space can lead to a richer life.
| Factor | Downtown 500 sq ft Condo | Pickering 2000 sq ft House |
|---|---|---|
| Daily Commute Time | 15-30 minutes (walk/TTC) | 2-3 hours (GO + driving) |
| Monthly Transit Cost | $156 (TTC Pass) | $300+ (GO) + $150 (parking) |
| Property Tax | $3,000/year | $6,000-8,000/year |
| Walk Score | 95-99 | 20-40 |
| Weekly Time Saved | 10-15 hours | Baseline |
| Annual ‘Life Dividend’ | 500+ hours gained | 500+ hours in transit |
Choosing a smaller, well-located home is the ultimate act of organization. It declutters your schedule, finances, and mind, creating the mental and temporal space that no amount of interior design alone can achieve.
Zipcar and Communauto: do you really need a second car in a walkable zone?
Once you’ve reclaimed your time by choosing a walkable downtown location, the next strategic move is to question the necessity of a car—or at least, a second one. For many Canadian families, two cars feel like a default, but in a high-density urban core like Toronto’s, a vehicle is often more of a liability than a luxury. It consumes a vast amount of two precious resources: space (a dedicated parking spot) and money.
The rise of the sharing economy with services like Communauto and Zipcar completely changes this equation. These services provide on-demand access to a vehicle for those specific trips—a weekend visit to a cottage, a large shopping run to IKEA—without the crushing burden of ownership. A Liberty Village resident, for instance, successfully eliminated their second car by creating a multi-modal transit strategy. By combining a TTC monthly pass, a Bike Share Toronto membership, and occasional Communauto use, they reported saving over $7,000 annually—money that directly funded a major renovation of their condo, including a Murphy bed and custom closets.
This is a perfect example of an intentional trade-off. You are not giving up mobility; you are trading the high fixed costs and spatial demands of a rarely-used asset for a flexible, cost-effective solution. This frees up significant capital for investments that directly improve your living space and quality of life.
To understand the staggering financial difference, consider the true annual cost of owning a car in downtown Toronto versus leveraging a car-sharing service. The numbers speak for themselves.
| Cost Category | Car Ownership | Communauto + TTC |
|---|---|---|
| Monthly Payment/Membership | $400-600 | $50 + $156 (TTC Pass) |
| Insurance (Downtown Toronto) | $200-350/month | Included |
| Parking Spot (Condo) | $250-400/month | $0 |
| Gas & Maintenance | $150-200/month | Included |
| Annual Total | $12,000-18,000 | $3,000-4,000 |
| Annual Savings | – | $8,000-14,000 |
By forgoing a car, you are not just saving money. You are eliminating the need for a parking space, which in many condos is a significant portion of your monthly fees, and freeing yourself from the mental load of maintenance and insurance. This is another layer of the “lifestyle dividend” in action.
How converting a dining room into a bedroom increases yield by 15% in student towns?
While making a small space feel bigger is about psychology, it can also be a savvy financial strategy, particularly for real estate investors. In university and college towns across Canada, such as Waterloo, Kingston, or London, the primary driver of rental income is the number of bedrooms, not the total square footage. This creates a powerful opportunity for increasing a property’s space yield: converting underutilized areas like a formal dining room or an oversized living room into an additional bedroom.
The return on this investment can be surprisingly swift and substantial. According to 2024 Canadian rental market data, a three-bedroom unit in a student-heavy market like Waterloo can command $600-$800 more in monthly rent than a comparable two-bedroom unit. With conversion costs for adding a wall and a door typically ranging from $2,000 to $5,000, the payback period can be as short as 12 to 18 months. After that, the increased rent becomes pure profit, significantly boosting the property’s annual yield.
A major hurdle in condos is often the building’s strict rules against permanent alterations. However, clever solutions have emerged to navigate this. As Marco Fontaine, an owner of a wall bed furniture company, notes, “Non-permanent conversion solutions using modular wall systems are increasingly popular as they don’t violate condo building alteration agreements while still creating separate bedroom spaces.” These systems can be installed and removed without structural changes, satisfying both tenants’ need for privacy and the condo board’s regulations. This makes the strategy accessible even to condo owners, not just those in freehold properties.
This approach reframes the idea of “making space.” Instead of just creating a feeling of spaciousness, you are manufacturing a tangible, income-generating asset. It’s a pragmatic application of space optimization that pays real financial dividends, proving that smart design can directly enhance an investment’s performance in specific Canadian markets.
Murphy beds and extending tables: are they practical for daily use or just gimmicks?
Multi-functional furniture is the holy grail of small-space living, with Murphy beds and extending tables leading the charge. The promise is seductive: a living room by day, a bedroom by night; a small console table that magically seats ten for dinner. But are these high-tech transformers practical for the grind of daily life, or are they just expensive gimmicks that are more trouble than they’re worth? The answer lies in a critical look at quality, mechanism, and your actual lifestyle.
The experience of Toronto townhouse owner Gary Prosserman is telling. He invested in a high-end, $16,500 Italian-made Murphy bed unit that integrates a sofa and bookshelf. After two years of regular use for his home office and guest room, he reports the mechanism remains smooth and reliable. For him, the investment was justified because it effectively “added a whole extra room” to his home. This highlights the crucial distinction: a high-quality, well-engineered system designed for daily transformation is an investment in functionality. A cheap, flimsy alternative is often destined to become a frustrating, stationary piece of furniture.
The chasm between high-end and budget options is vast, not just in price but in daily usability. A premium system might convert in under 20 seconds with one hand, while a budget version could be a 45-second, two-person struggle. This difference is what separates a seamless daily routine from an annoying chore that you’ll eventually avoid.
Before investing, you must honestly assess your needs. Is this for a guest room used three times a year, or is it your primary bed? The following comparison breaks down the key differences between a premium system and a budget-friendly option.
| Feature | Resource Furniture (Italian) | Budget Options (e.g., Raze) |
|---|---|---|
| Price Range | $16,500+ | $1,500-$3,000 |
| Mechanism Warranty | Lifetime | 5-25 years |
| Transformation Time | Under 20 seconds | 30-45 seconds |
| Mattress Compatibility | Up to 12-inch | Up to 10-inch |
| Daily Use Rating | Designed for daily | Occasional recommended |
| Lead Time | 16-20 weeks | 2-4 weeks |
Ultimately, a Murphy bed or extending table is not a gimmick if it solves a real problem with a high-quality mechanism you are willing to use every day. It becomes a gimmick when the hassle of transformation outweighs the benefit of the extra space. Choose wisely, because in a small condo, every square foot—and every piece of furniture—must earn its keep.
How to adopt a “one in, one out” policy without feeling deprived?
The “one in, one out” rule—where you must get rid of an old item for every new one you acquire—is a cornerstone of minimalist living. Yet, for many, it triggers a sense of anxiety and deprivation. The fear of letting go of something you *might* need one day can be paralyzing. The secret to adopting this policy successfully is to reframe it not as a rule of deprivation, but as an act of upgrading and curation, and to build a system that removes the emotional sting from the process.
Instead of feeling like you’re losing something, think of it as maintaining the integrity and quality of your personal collection. You are not just making space; you are elevating your environment. This means replacing a fast-fashion t-shirt with a high-quality, Canadian-made piece from a brand like Kotn, or swapping out ten mediocre paperbacks for one beautifully bound classic you’ll treasure. This shift in mindset transforms decluttering from a chore into a rewarding act of self-care. The goal is a home filled only with items you use, love, and that bring you joy, rather than a storage unit for your “just in case” anxieties.

To make the process less painful, create a low-stakes “purgatory” for your items. The Canadian 90-Day Outbox Method is a brilliant, emotionally intelligent system for this. It gives you a full season to see if you truly miss an item before it leaves your life for good.
Your Action Plan: The Canadian 90-Day Outbox Method
- Create the ‘Outbox’: Designate a specific storage bin, perhaps from Canadian Tire or HomeSense, as your official “outbox.” Place it in a closet or storage locker.
- Populate and Date: When you’re considering removing an item—a piece of clothing, a kitchen gadget, a book—place it in the box and mark it with the current date.
- Set a Reminder: Immediately set a calendar reminder for 90 days from now. This corresponds to one full Canadian season, a perfect timeframe to assess an item’s true utility.
- Assess and Donate: When the reminder goes off, check the box. If you haven’t needed or even thought about the item in those 90 days, you can confidently let it go. Donate it to a local charity like Diabetes Canada.
- Replace with Quality: The “out” part is done. Now, for the “in” part, you can consciously replace the removed item with a higher-quality, more meaningful version when the need arises.
Furthermore, leveraging the sharing economy can eliminate entire categories of possessions. Services like the Toronto Tool Library allow you to borrow bulky, rarely-used items like power drills or carpet cleaners, freeing up immense amounts of storage space and saving you money.
Floor-to-ceiling shelving: utilizing the top 2 feet of your walls effectively
In a small condo, the most underutilized real estate is the vertical space above your head. Most people stop their storage at eye level, leaving the top two or three feet of wall space completely empty. Reclaiming this “air space” with floor-to-ceiling shelving is one of the most effective ways to dramatically increase your storage capacity without sacrificing a single square foot of floor space. However, the key is to do it strategically, so it reduces clutter rather than adding to it.
This upper zone is not for daily-use items. It’s the perfect home for what I call “deep storage”—things you need, but don’t need often. For Canadians, this most obviously means seasonal items. The bulky winter parkas, ski gear, and heavy boots that clog your main closet for eight months of the year can be neatly stored away in the summer, and vice-versa for patio cushions and camping gear in the winter. According to a report on Canadian self-storage trends, over 60% of storage unit users in Toronto are condo-dwellers, many of whom could avoid that recurring monthly fee by simply looking up.
The aesthetic execution is critical to prevent the room from feeling top-heavy or cluttered. The trick is to create a visual recession effect. Use storage boxes that are the exact same color as your wall paint. This makes the boxes visually “disappear,” turning the storage into a textured architectural feature rather than a stack of clutter. Labels should be clear but placed on the top of the bins, invisible from below, maintaining a clean sightline.
For anyone living in a modern Canadian condo, it’s also vital to consider construction. Many new builds use concrete shear walls. Installing heavy shelving requires the right anchors and professional installation to be safe and secure. Here is a simple system for organizing your newfound vertical space:
- Summer Storage (Top Shelves): Pack bulky winter items like parkas, snow pants, and boots into matching bins from a store like Canadian Tire. This clears out your primary closet for easy access to your summer wardrobe.
- Winter Storage (Top Shelves): In the fall, swap out the winter gear. Store away summer sporting equipment, beach towels, and camping supplies.
- Visual Trick: Use bins that match your wall colour. This creates an illusion of depth and makes the storage less obtrusive.
- Smart Labeling: Label every bin clearly, but place the label on the top surface. From the ground, all you see is a clean, uniform wall of storage.
The visual noise mistake: why open shelving makes small spaces look smaller
For years, interior design blogs have championed open shelving as a way to make small spaces feel airy and light. This is one of the most pervasive and damaging myths in small-space design. In reality, for most people, open shelving is a primary source of visual noise—the chaotic jumble of shapes, colours, and labels that overwhelms the eye and makes a room feel cluttered, chaotic, and ultimately, smaller.
As Toronto-based design expert Alexandra Gater explains, “Every disparate item on an open shelf is a piece of information your brain must process, increasing cognitive load and making a space feel chaotic and smaller.” Your brain craves order and simplicity. When it’s forced to process dozens of unrelated items—the half-empty bag of quinoa next to a stack of mismatched mugs and a tangle of charging cables—it registers the space as stressful and cramped. Closed storage, on the other hand, presents a single, uniform surface. It calms the brain and creates an immediate sense of spaciousness and serenity.
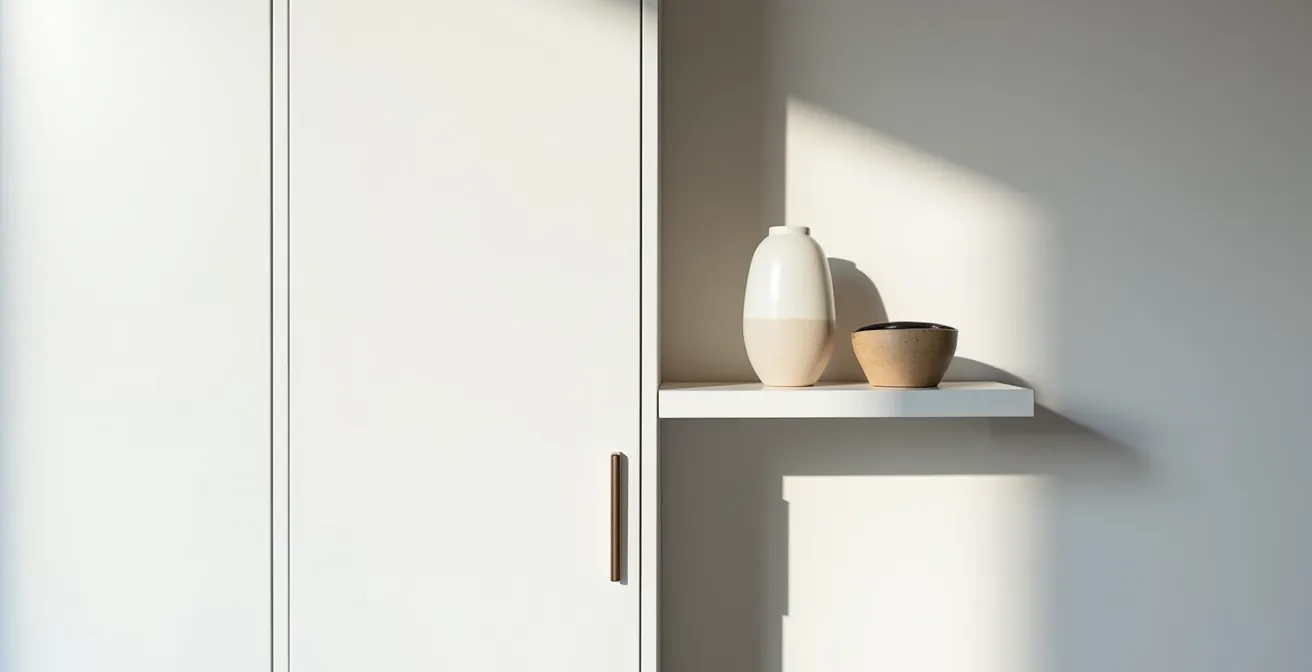
This doesn’t mean your home has to be devoid of personality. The solution is the 80/20 Gallery Rule. Keep 80% of your belongings tucked away behind the calm facade of closed doors (e.g., IKEA’s BESTÅ or PAX systems are perfect for this). Then, dedicate the remaining 20% of your display space to a few small, curated “galleries”—a single floating shelf, a small section of a bookcase—where you display only your most beautiful and meaningful objects. This approach allowed Toronto designer Elise Yu to transform her tiny 300-square-foot studio. By hiding 80% of her possessions and curating the rest, she reports the space now “feels twice as large.”
Every disparate item on an open shelf is a piece of information your brain must process, increasing cognitive load and making a space feel chaotic and smaller.
– Alexandra Gater, YouTube Interior Design Expert
By swapping your open shelves for closed storage, you are performing an act of visual decluttering. You are telling your brain it can relax. This single change often has a more profound impact on the perception of space than any mirror or paint colour ever could.
Key Takeaways
- The feeling of spaciousness is more about managing ‘visual noise’ and psychological comfort than raw square footage.
- Intentional trade-offs, like choosing a walkable location over a large suburban house, yield a ‘lifestyle dividend’ of time and money that far outweighs the extra space.
- Closed storage is superior to open shelving in small spaces because it reduces cognitive load, making a room feel calmer and larger.
How to light a windowless den to make it feel like a real room?
The windowless den is a common feature in many modern Canadian condos—a small, dark box often relegated to a storage closet or a depressing home office. However, with a strategic approach to lighting, you can transform this space into a bright, inviting, and fully functional room. The secret is to mimic the properties of natural light by implementing a three-layer lighting system.
Natural light isn’t a single, static source; it’s a dynamic combination of ambient, task, and accent light that changes throughout the day. By recreating these layers artificially, you can trick the brain into perceiving the space as larger and more pleasant. A single, harsh overhead light will only emphasize the room’s boxiness. A layered system, however, creates depth, dimension, and warmth.
Here’s how to build your three-layer system:
- Layer 1 – Ambient Light: This is your foundational light, replacing the sun. Install a powerful, flush-mount ceiling fixture with a dimmer. Aim for 3000-5000 lumens to truly flood the space. This fixture should provide broad, even illumination.
- Layer 2 – Task Light: This is focused light for specific activities. Add a bright desk lamp for your work area, or install under-cabinet LED strips if you have shelving. This prevents eye strain and creates pools of light that make the space more dynamic.
- Layer 3 – Accent Light: This is the “magic” layer that creates mood and depth. Position a floor lamp in a corner, washing light up the wall, or use small picture lights to highlight artwork. This draws the eye around the room and breaks up flat, boring surfaces.
To take it a step further, use smart bulbs (like Philips Hue) to introduce circadian rhythm programming. You can program the lights to emit a cool, energizing daylight (around 5000K) during the day and shift to a warm, relaxing sunset glow (around 2700K) in the evening. This mimics the natural progression of the sun and has been shown to improve mood and productivity. Designer Alexandra Gater even installed a backlit LED “faux window” in her windowless Toronto office to achieve this effect, significantly improving the room’s atmosphere.
Finally, the one time a large mirror is non-negotiable: place a large, vertical mirror on the wall directly opposite your main light source. This will effectively double the perceived brightness and add a powerful illusion of depth, completing the transformation from a dark den to a vibrant room.
By embracing these strategies—from macro lifestyle choices to micro-adjustments in lighting and storage—you can fundamentally change your relationship with your home. Making a 500-square-foot condo feel like 800 isn’t about magic; it’s about making smart, intentional choices that prioritize psychological comfort and a high-quality life over mere square footage. Start today by implementing one of these ideas, and begin the journey of transforming your space into a home that truly supports and expands your life.