The giant icicles on your roof are not a sign of a harsh winter; they’re a clear signal that your house is suffering from a building system failure.
- Quick fixes like heating cables or aggressive ice removal only address the symptom, leading to recurring costs and potential roof damage.
- The true cause is a flawed thermal envelope and inadequate ventilation, which allows heat to escape the attic and melt snow from underneath.
Recommendation: Instead of fighting the ice every year, your first step should be to schedule a professional EnerGuide evaluation to diagnose the specific heat loss and ventilation issues in your attic.
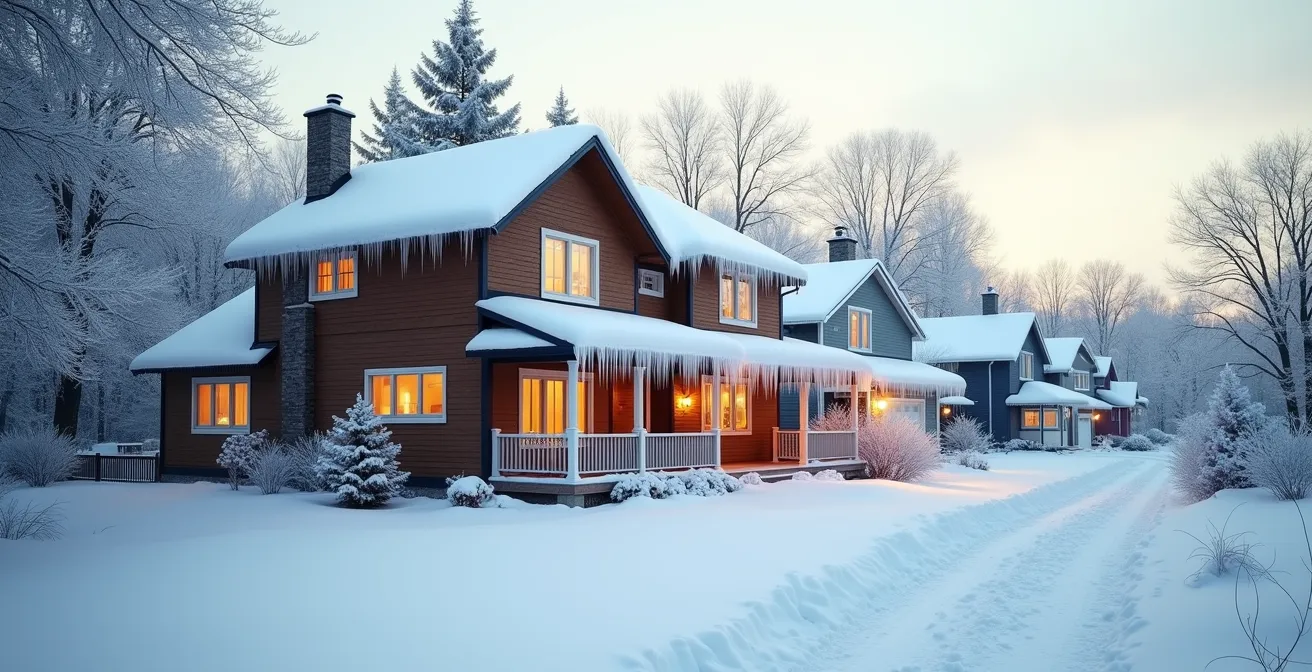
That familiar drip, drip, drip. For many Canadian homeowners, it’s the dreaded soundtrack of the winter thaw. You look up and see a fortress of ice along your eaves, with massive icicles hanging like malevolent teeth. Then, the real fear sets in: you notice a water stain spreading across the ceiling or running down an interior wall. The immediate reaction is often panic, followed by a search for quick fixes—chipping away the ice, throwing salt-filled socks on the roof, or installing zigzag heating cables. While these actions might provide temporary relief, they fundamentally misunderstand the problem.
These gigantic ice formations, known as ice dams, are not simply a product of a cold Canadian winter. They are a clear, visible symptom of a deeper issue: a critical failure in your home’s building system. Specifically, they are born from the costly heat escaping your living space into an improperly sealed and ventilated attic. This heat melts the bottom layer of snow on your roof, which then runs down to the cold eave, where it refreezes and builds up, creating a dam that traps water behind it. This trapped water then has nowhere to go but under your shingles and into your home.
The key takeaway is this: you have a heat loss problem, not a roofing problem. Attacking the ice itself is like taking a cough drop for pneumonia. It might soothe the symptom, but it does nothing to cure the underlying disease that is actively damaging your home’s structure and costing you money in wasted energy. This is a diagnostic challenge.
This guide will walk you through the process of diagnosing the root causes of ice dams, from attic ventilation failures to poor insulation choices. We will dissect the popular “solutions” to reveal why they often fall short and outline the definitive steps to permanently weather-proof your home against the destructive freeze-thaw cycle, turning your house from a victim of winter into a resilient, efficient system.
To properly diagnose and cure your home’s ice dam problem, it’s essential to understand each component of the system failure. This guide breaks down the critical areas, from ventilation mistakes to permanent insulation solutions.
Summary: Diagnosing and Curing the Building System Failures That Cause Ice Dams
- Why adding insulation without improving soffit venting makes ice dams worse
- Steam vs Calcium Chloride: how to remove an ice dam without destroying your roof?
- Do zigzag heating cables actually solve the problem or just mask the symptom?
- How gutters contribute to ice dams and when to remove them completely?
- Why ice and water shield membrane is mandatory in roof valleys
- Spray foam or Fiberglass: which offers better value for basement walls?
- Exposed vs Hidden fasteners: why spending extra prevents leaks 15 years later?
- How to upgrade your attic insulation to R-60 to stop ice dams permanently?
Why adding insulation without improving soffit venting makes ice dams worse
A common mistake homeowners make is to believe that “more insulation” is the silver bullet for heat loss. They diligently add batts or blow in loose-fill fiberglass, hoping to stop the heat from reaching the attic. However, if this is done without simultaneously addressing attic ventilation, you can inadvertently create a more severe ice damming problem. An attic isn’t just a dead space; it’s a critical part of your home’s breathing apparatus. It needs a continuous, balanced flow of cold, dry outside air to function correctly.
This system relies on a clear ventilation pathway. Cold air enters through the soffit vents (under the eaves), flows up along the underside of the roof deck, and exhausts warm, moist air out through ridge, gable, or roof vents. When you add insulation, it’s easy to block the soffit vents, effectively suffocating the attic. Without this cool air intake, the attic space stagnates and warms up from residual heat loss, creating the perfect conditions for snow to melt on the roof. The National Building Code of Canada is clear on the importance of this, as the NBCC specifies a 1/300 ventilation ratio, meaning for every 300 square feet of attic floor space, you need 1 square foot of net-free ventilation area, balanced between intake and exhaust.
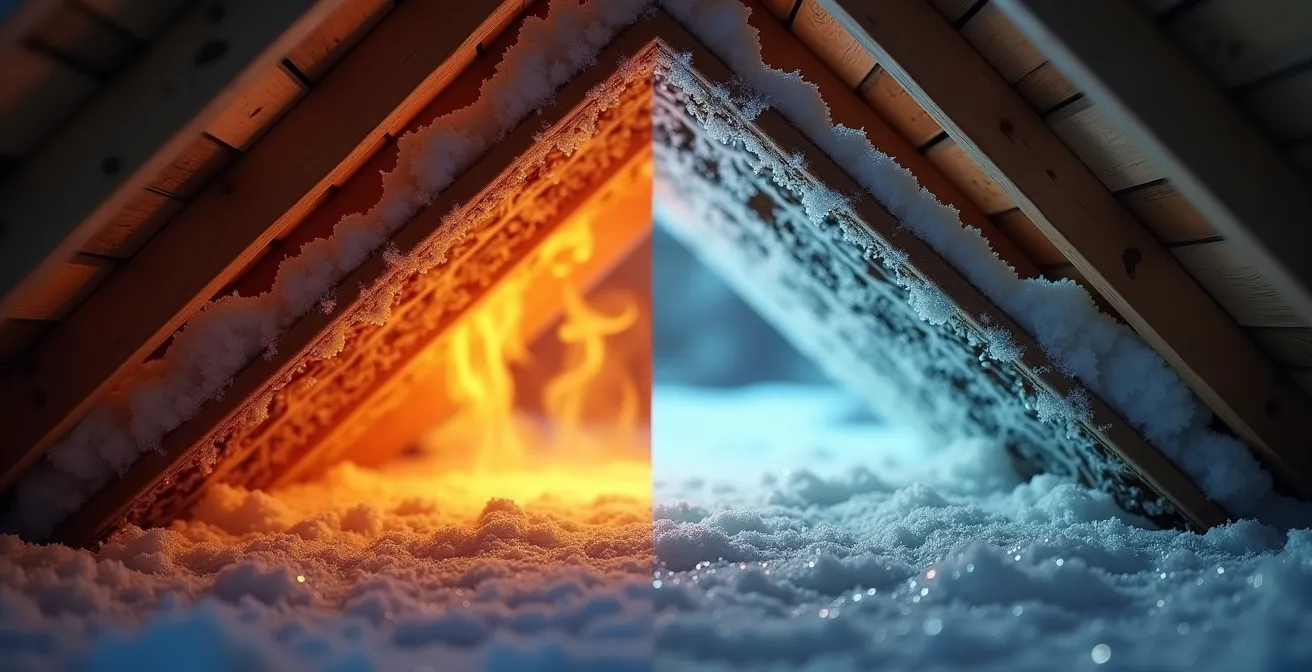
This diagram perfectly illustrates the “hot roof” phenomenon. The blocked soffit on the left prevents the cooling airflow, allowing the entire roof deck to warm up and melt snow. On the right, the clear ventilation pathway keeps the roof deck cold, preventing the initial melt. A proper diagnostic approach involves not just checking insulation depth, but physically verifying that every soffit vent is clear and that baffles are installed to maintain an air channel after insulation is added. Simply piling on insulation without securing this pathway is a recipe for disaster.
Therefore, any insulation upgrade must begin with a ventilation audit. It’s a two-part system, and treating only one half is a guaranteed way to make the problem worse.
Steam vs Calcium Chloride: how to remove an ice dam without destroying your roof?
When a thick ice dam has formed and water is threatening to enter your home, immediate removal becomes necessary. In this emergency scenario, homeowners are often tempted by aggressive or seemingly simple solutions, but the method you choose can be the difference between solving the immediate crisis and creating long-term roof damage. Two common methods are chemical melters, like calcium chloride, and professional steaming.
Throwing salt-filled pantyhose or sprinkling bags of rock salt (sodium chloride) or even calcium chloride onto the ice is a popular DIY approach. While these chemicals do melt ice, they come with significant risks. They are highly corrosive and can damage asphalt shingles, accelerate the rusting of metal flashing, gutters, and downspouts, and stain your roof. More importantly, the runoff can kill vegetation and damage concrete walkways below. It’s a messy, imprecise solution that often causes more harm than good.
The professional standard for safe and effective ice dam removal is low-pressure steam. A specialized steamer uses high temperatures, not high pressure, to cut through the ice in a grid-like pattern. This allows the dam to be removed in chunks without brute force. It is the only method that does not risk physically damaging the shingles through chipping or introducing corrosive chemicals. While it is an investment, with professional steam removal in Toronto costs between $300 and $1,500 depending on the severity, it is a surgical procedure, not a blunt attack. It’s crucial to remember that this is an emergency measure, not a permanent solution. Paying for removal is treating the symptom, but it’s the safest way to do so while you plan to fix the root cause. Many homeowners’ insurance policies reflect this distinction. As the Insurance Bureau of Canada notes:
Standard homeowners’ insurance policies commonly cover sudden and accidental water damage caused by ice dams. However, ongoing or repeated damage is considered a long-term maintenance issue and may not be covered under a home insurance policy.
– Insurance Bureau of Canada, In Focus: Stay Protected
Ultimately, choosing steam is choosing to protect your roof’s integrity. It’s the responsible first-aid measure before you can perform the necessary surgery on your attic’s insulation and ventilation system.
Do zigzag heating cables actually solve the problem or just mask the symptom?
Walk through any Canadian neighbourhood in winter, and you’ll see them: black zigzag cables tracing the edges of roofs. Heating cables are marketed as a straightforward solution to ice dams. The logic seems simple: if ice is the problem, melt it. However, from a building diagnostician’s perspective, these cables are the ultimate symptomatic treatment. They do absolutely nothing to address the underlying heat loss and ventilation failures that cause the ice in the first place.
Heating cables work by creating narrow channels in the ice, allowing meltwater to drain away. This can, in some cases, prevent water from pooling and backing up under the shingles. But consider what is actually happening: you are spending money on electricity to melt snow with heat that you already paid to generate inside your house, which is escaping through your faulty attic. It’s a cycle of waste. Furthermore, they are often ineffective against very large dams and can even contribute to thicker ice formation just beyond their reach. Some innovative systems claim better efficiency, but the core principle remains. As HotEdge Canada, a system provider, states, their goal is to “Melt more with less,” acknowledging the energy cost is a key factor for consumers.
When you analyze the long-term costs, the argument for treating the root cause becomes even stronger. The initial expense of upgrading your attic insulation is higher, but the financial and practical benefits quickly outstrip the annual cost of running heating cables, especially with government incentives.
This table compares the 10-year cost of relying on heating cables versus a one-time attic insulation upgrade, factoring in available Canadian grants.
| Solution | Initial Cost | Annual Operating Cost | Available Grants | 10-Year Total |
|---|---|---|---|---|
| Heating Cables | $500-800 | $200-400 | $0 | $2,500-4,800 |
| Attic Insulation R-50 | $3,000-4,000 | $0 | Up to $1,800 | $1,200-2,200 |
In short, heating cables are a band-aid on a gaping wound. They keep the issue “out of sight, out of mind” for a while, but the building is still bleeding heat and energy, and the risk of water damage remains. A true diagnosis leads to a cure, not a perpetual treatment.
How gutters contribute to ice dams and when to remove them completely?
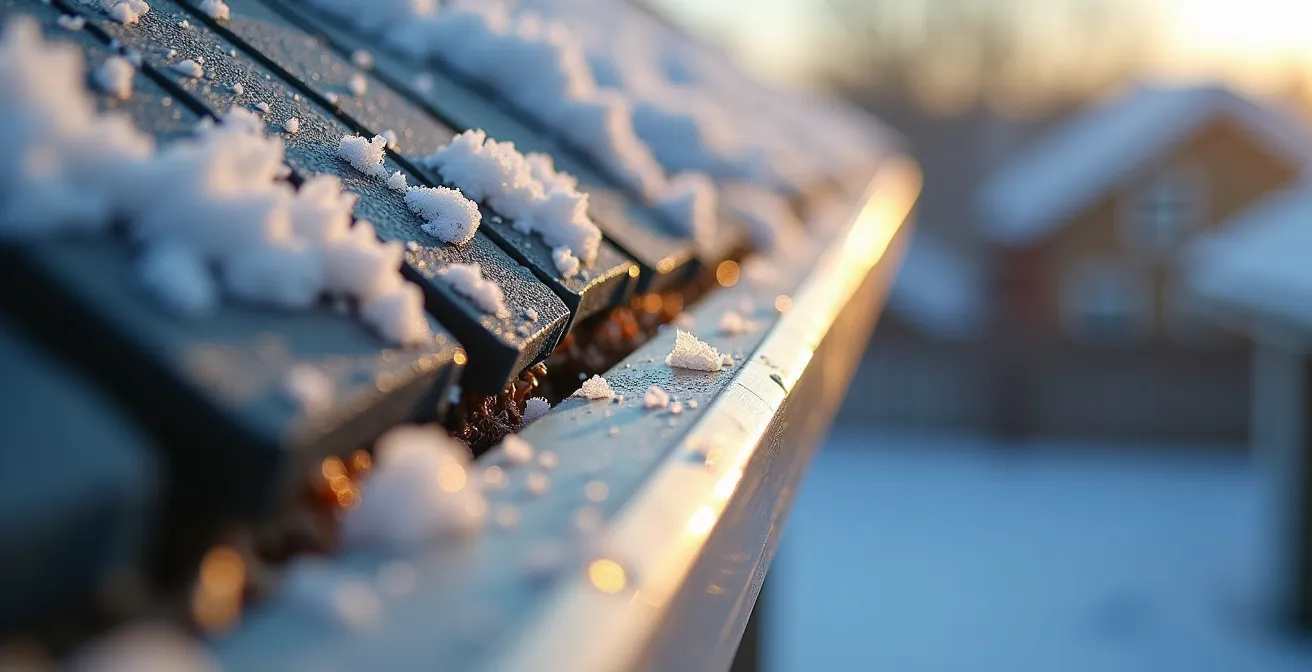
Gutters have a complicated and often misunderstood relationship with ice dams. While they don’t cause the initial melt, they provide the perfect scaffolding for an ice dam to form and grow. A gutter’s primary job is to manage water, but in a Canadian winter, it often becomes an ice tray. Any debris left over from the fall—leaves, twigs, shingle grit—creates a blockage. When meltwater runs off the warm roof, it hits this blockage and the cold, shaded gutter, where it freezes solid.
This initial blockage is the seed of the ice dam. As more water flows down, it pools behind the frozen gutter and freezes, with the dam growing progressively larger and creeping back up the roofline. The situation is exacerbated in many parts of Canada. For example, as a regional analysis points out, Ontario roofs have a complicated relationship with ice dams due to heavy snowfall and lake effect snow, making diligent gutter maintenance essential. Furthermore, frost heave can push full, frozen gutters away from the fascia, creating gaps where water can penetrate directly behind the eavestrough.
In some extreme northern climates or on homes with persistent, severe ice dam issues despite other corrections, the most radical but effective solution can be to remove the gutters entirely. This is a trade-off. Without gutters, meltwater and rain will fall directly to the ground at the foundation line. This requires careful grading and landscaping below to ensure water drains away from the house and does not create a basement water problem. However, by removing the “ice tray” from the eave, you eliminate the primary platform where dams form. For most homes, though, diligent maintenance is the more practical approach.
Your Gutter Maintenance Checklist for Ice Dam Prevention
- Fall Cleanup: Remove all leaves and debris from gutters completely before the first snowfall.
- Check Gutter Slope: Ensure the gutter drops about 1/4 inch for every 10 feet of run towards the downspout.
- Inspect for Damage: Look for signs of frost heave, such as gutters pulling away from the fascia board.
- Test Downspouts: Run a hose to ensure water flows freely and doesn’t pool anywhere.
- Evaluate Gutter Guards: Consider if guards will help in your climate or if they are prone to creating an “ice shelf” on top.
Think of your gutters as the final checkpoint for water leaving your roof. Keeping them clean and functional is a critical part of a holistic ice dam prevention strategy, even if it doesn’t solve the root heat loss problem.
Why ice and water shield membrane is mandatory in roof valleys
Even on a perfectly insulated and ventilated roof, some areas are inherently more vulnerable to water intrusion from ice and snow. The most critical of these are roof valleys, where two roof planes meet, channeling a high volume of water and snow. This is why building codes mandate a secondary layer of defense in these areas: a self-adhering membrane commonly known as an “ice and water shield.”
Unlike standard roofing felt or underlayment, which are simply water-resistant, an ice and water shield is a specialized waterproof membrane. As described by Canadian Home Inspection Services, “Ice and water barrier is a type of self-sealing underlayment that adheres to the roof decking and waterproofs it.” Its key feature is a sticky, rubberized asphalt adhesive that bonds directly to the roof deck. Crucially, when roofing nails are driven through it, this rubberized material creates a watertight seal around the nail shank. This prevents water that gets under the shingles—a common occurrence with wind-driven rain or ice damming—from reaching the wood sheathing.
The National Building Code of Canada recognizes the vulnerability of roof edges to ice damming. That’s why the building code requires ice and water barrier for the first 36 inches up from the eave’s edge, as well as in all valleys. This membrane acts as a last line of defense. It acknowledges that under the harsh conditions of a Canadian winter, shingles alone may not be enough. The shield essentially creates a waterproof “pan” at the most vulnerable parts of your roof.
From a diagnostic standpoint, the absence or improper installation of this membrane is a major red flag, especially on older homes. During a re-roofing project, ensuring this shield is installed correctly is non-negotiable for long-term water damage prevention. It is a fundamental component of a resilient roofing system designed to withstand the realities of freeze-thaw cycles.
While it doesn’t stop an ice dam from forming, it provides a critical safety net that can prevent a costly leak when a dam does occur. It’s a belt-and-suspenders approach that is absolutely necessary for any Canadian roof.
Spray foam or Fiberglass: which offers better value for basement walls?
While ice dams are an attic problem, a true building diagnostician understands the house as a complete system. Heat loss isn’t confined to the ceiling; the entire thermal envelope matters. An uninsulated basement is a massive source of heat loss and can contribute to the “stack effect,” where cold air is drawn in at the bottom of the house, pushing warm air up towards the attic. Therefore, insulating your basement is a key part of the overall cure. When it comes to basement walls, the two most common choices in Canada are fiberglass batts and closed-cell spray foam (2lb).
Fiberglass batts are the traditional, lower-cost option. They are effective insulators but have a major vulnerability in a basement environment: they offer no air or moisture barrier. This means you must install a separate polyethylene vapour barrier meticulously, and any gaps or tears will compromise the system. In a typically damp basement, fiberglass can also trap moisture, leading to mould and reduced effectiveness. Closed-cell spray foam, while more expensive upfront, provides insulation, an air barrier, and a vapour barrier in a single application. It adheres directly to the concrete, creating a monolithic, gap-free seal that is impervious to moisture.
The choice often comes down to budget versus performance. However, with Canadian energy rebates like the Home Efficiency Rebate Plus program, the long-term value proposition of spray foam becomes much more compelling.
This comparison shows how the materials stack up, considering their properties and the impact of available grants on the return on investment.
| Material | R-Value per inch | Cost per sq ft | Air Sealing | Grant Eligibility | ROI with Grant |
|---|---|---|---|---|---|
| Closed-cell Spray Foam | R-6 to R-7 | $1.50-2.50 | Excellent | Up to $1,800 | 3-5 years |
| Fiberglass Batts | R-3.5 | $0.50-1.00 | Requires separate barrier | Up to $1,800 | 2-4 years |
Checklist for Hiring a Certified Canadian Insulation Installer
- Verify WSIB or WorkSafeBC coverage for worker protection in your province.
- Check for manufacturer certification for the specific insulation products they install.
- Confirm they are a registered contractor with the NRCan energy advisor network to qualify for grants.
- Request proof of liability insurance with a minimum of $2 million in coverage.
- Ask for references from recent Canadian Greener Homes Grant projects.
For the demanding below-grade environment of a Canadian basement, the superior air and moisture control of closed-cell spray foam often makes it the better long-term investment in your home’s overall thermal performance, directly contributing to solving the problems that lead to ice dams.
Exposed vs Hidden fasteners: why spending extra prevents leaks 15 years later?
The principle of diagnosing system-wide weaknesses extends to every component of the building envelope, including the choice of roofing material and its installation method. While most ice dam discussions focus on asphalt shingles, metal roofs are increasingly popular in Canada for their longevity. However, they are not immune to ice-related issues, and the type of fastener system used is a critical detail that determines their long-term performance.
Exposed fastener metal roofs are the more economical option. The panels are overlapped and fastened directly through the face of the metal into the roof deck with colour-matched screws. Each screw is sealed with a neoprene washer, but this creates thousands of potential failure points on the roof. Over time, the relentless Canadian freeze-thaw cycles, where Canadian roofs experience extreme temperature swings from -30°C to +30°C, cause the metal panels to expand and contract. This movement, known as thermal cycling, can slowly “walk” the screws out of their holes, breaking the washer’s seal and creating a direct path for water entry.
Hidden fastener systems, or standing seam roofs, are the superior diagnostic choice. The panels are joined together with a raised, interlocking seam, and are secured to the roof deck with clips that are hidden beneath the panels. This design allows the metal to expand and contract freely without stressing the fasteners. More importantly, there are no exposed screws and therefore no penetrations on the flat surface of the roof. As one study on metal roofs highlights, “Ice is heavy, and as it forms and expands, it can… even compromise the seams of roof panels. Severe ice dams can lift roof edges, compromising the entire roofing system.” An exposed fastener system under this stress is far more likely to develop leaks than a standing seam roof where the fasteners are protected.
While a standing seam roof represents a significantly higher initial investment, it is a truly permanent roofing solution designed to withstand the forces of ice and thermal cycling for decades without requiring the regular maintenance and re-tightening of screws that an exposed fastener system will inevitably need.
Key takeaways
- Ice dams are a symptom of a building system failure (heat loss + poor ventilation), not just a weather event.
- Quick fixes like heating cables and chemical de-icers are costly, temporary measures that mask the root cause and can damage your home.
- A permanent solution involves a two-part strategy: air sealing the attic floor and upgrading insulation to R-60, combined with ensuring a clear ventilation pathway from soffit to ridge.
How to upgrade your attic insulation to R-60 to stop ice dams permanently?
After diagnosing the system failures, the final step is the cure: a comprehensive attic upgrade. The goal is to create a thick, continuous thermal barrier and a robust ventilation system that keeps the underside of your roof deck the same temperature as the outside air. In most Canadian climate zones, the recommended target for attic insulation is R-60. This level of insulation, combined with meticulous air sealing, effectively stops the upward flow of heat that is the root cause of ice dams.
Before adding any insulation, the first and most critical step is air sealing. You must find and seal every single penetration in your attic floor—gaps around plumbing stacks, electrical wires, pot lights, and the attic hatch itself. A small 1-square-inch hole can negate the effectiveness of square feet of insulation. Use canned spray foam for gaps and solid, insulated covers for hatches. A critical safety consideration, especially in older homes, is the potential presence of asbestos. As insulation experts warn, older Canadian homes built before 1990 may contain Zonolite vermiculite insulation which can contain asbestos. Professional testing and abatement may be required before any work can begin.
Once sealed, you can add insulation to reach R-60 (about 20-22 inches of blown-in fiberglass or cellulose). The Canadian federal government, through the Canada Greener Homes Initiative, provides significant financial incentives to help homeowners with this crucial upgrade. Homeowners can receive grants to offset the cost of both the initial energy audit and the insulation work itself, with homeowners can receive up to $1,800 for attic insulation upgrades.
Your Step-by-Step Canada Greener Homes Grant Process
- Step 1: Find a registered EnerGuide advisor through the NRCan website for your province.
- Step 2: Schedule a pre-retrofit evaluation to get a baseline energy model of your home.
- Step 3: Receive a detailed report with recommended upgrades and eligible grant amounts.
- Step 4: Complete the insulation upgrade to a minimum of R-50 (R-60 is recommended for the best performance).
- Step 5: Schedule a post-retrofit evaluation to verify the improvements have been made correctly.
- Step 6: Submit your documentation to receive your grant.
To put these principles into practice and permanently solve your home’s ice dam issues, the next logical step is to engage a certified professional to perform a detailed energy audit. This provides the blueprint for a targeted, effective, and financially assisted upgrade that will protect your home for decades to come.